Configure PostgreSQL for SAML SSO (Azure)
This page shows how to configure Appsmith on Azure Container Instance for using Security Assertion Markup Language (SAML) Single Sign-On (SSO).
Prerequisites
- Azure account with permission to create and manage PostgreSQL resources.
- Ensure that you have taken a manual backup for your instance. See Backup instance
Set up PostgreSQL in Azure
Follow these steps to set up a PostgreSQL instance in Azure. It's recommended to create PostgreSQL in the same region and availability zone as your Appsmith deployment for optimized performance.
-
Log into the Azure Portal.
-
In the left-hand menu, select Create a resource and search for Azure Database for PostgreSQL.
-
Select Single server and click Create.

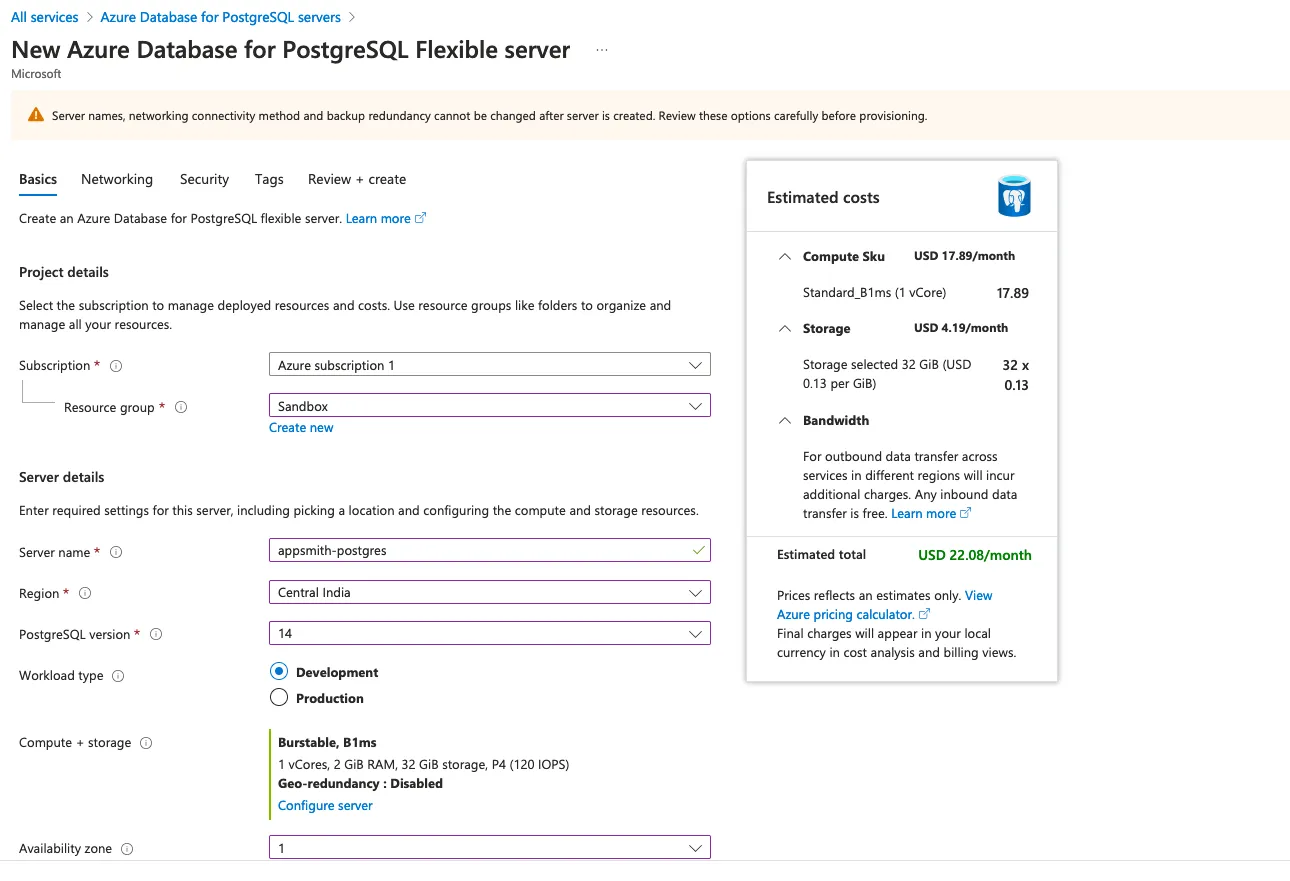
- In the Basics tab, set up:
-
Subscription: Select Subscription 1.
-
Resource Group: Select Sandbox.
-
Server Name: Enter appsmith-postgres.
-
Region: Select the region matching your Appsmith deployment for optimized latency.
-
PostgreSQL Version: Choose Version 14.
-
Workload Type: Select Development.

-
In the Compute + storage section, configure as needed based on performance requirements.
-
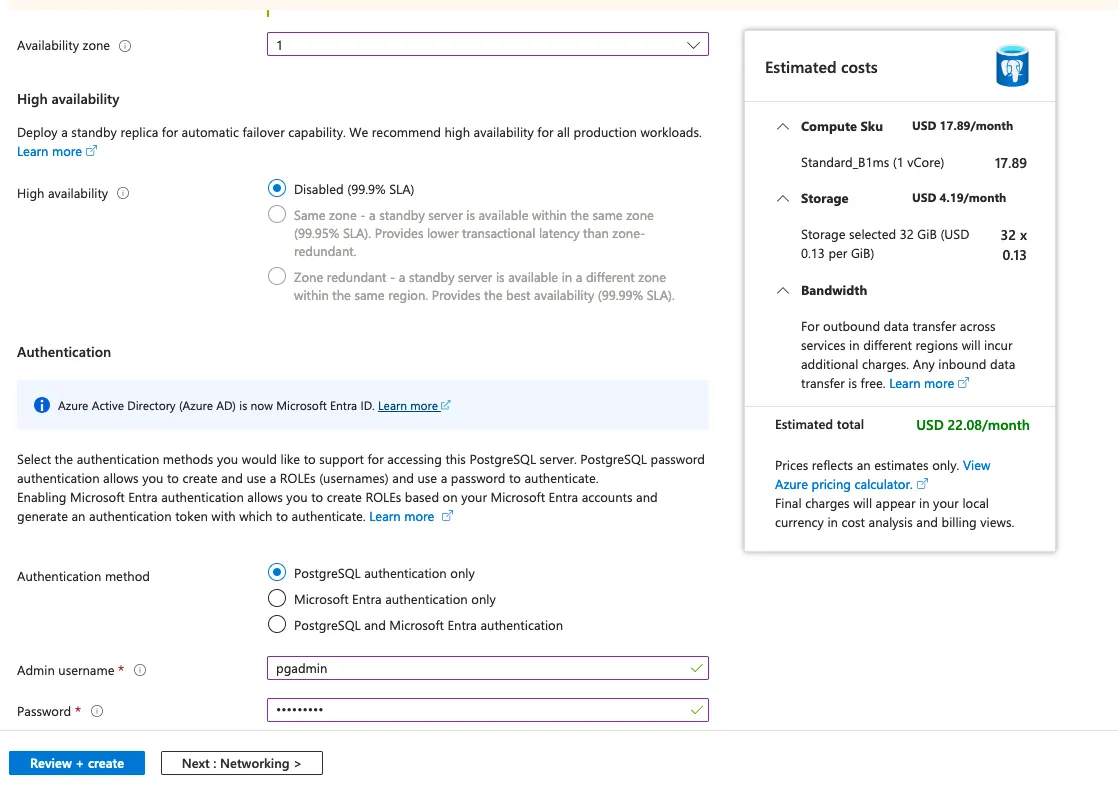
In the Authentication Settings:
-
Authentication Method: Select PostgreSQL Authentication Only.
-
Username: Enter your preferred username (for example,
pgadmin). -
Password: Set a secure password.

- Once the setup is complete, click Next: Networking.
Set up Firewall Rules
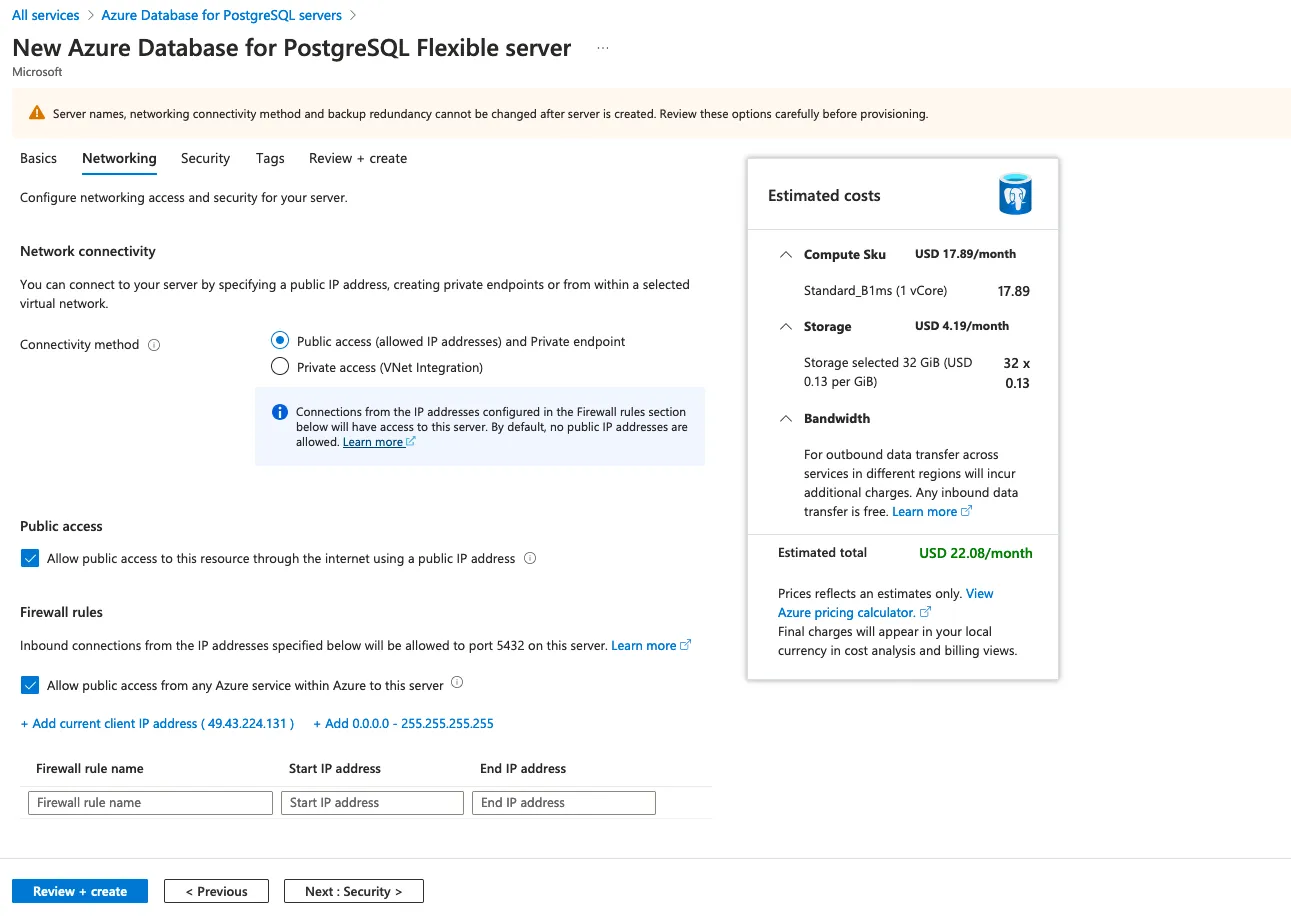
Configure firewall rules for your PostgreSQL instance to ensure secure access. By default, you can enable public access, but it's recommended to restrict access to specific IP addresses in production environments.
-
In the Azure Portal, go to the Networking tab of your PostgreSQL server.
-
Under Firewall rules, choose one of the following options:
Add your IP address or select Allow Azure services and resources to access this server if you want to enable broader access temporarily.

- Click Save to apply the firewall settings.
Connect to PostgreSQL Database
After setting up your PostgreSQL instance, connect to it using the provided credentials.

-
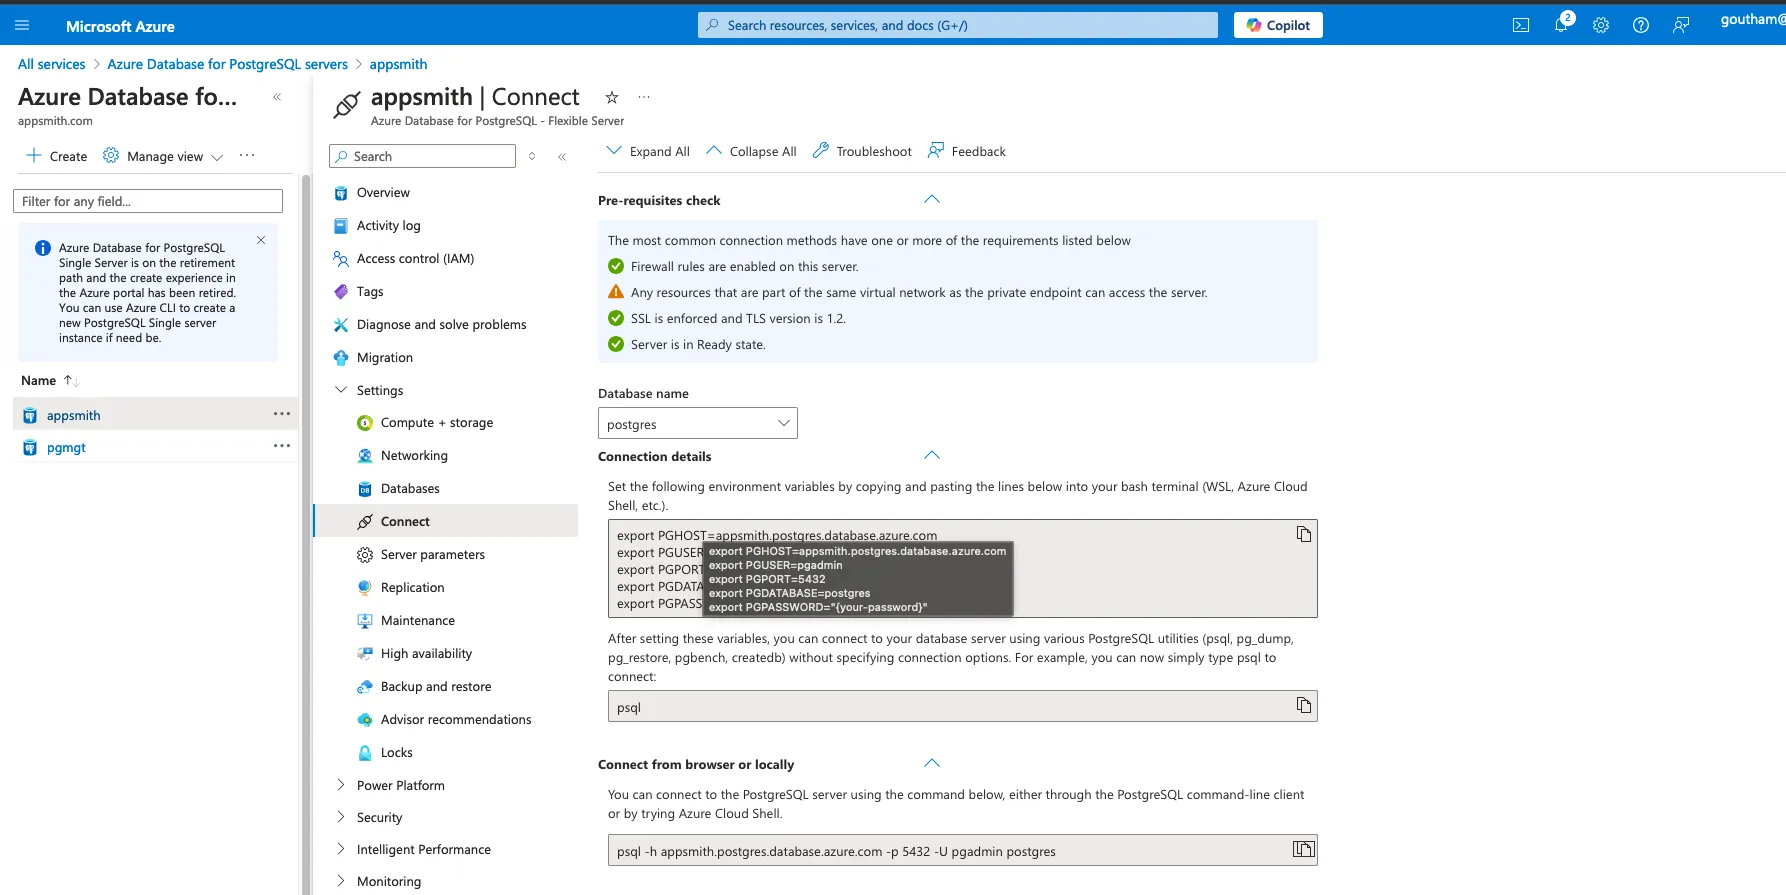
In the Azure Portal, navigate to All resources and select your PostgreSQL server instance.
-
Find your connection details (
host,port,username, anddatabase name). -
Open a terminal and use the following command to connect to your PostgreSQL database:
# Format
psql -h <hostname> -p <port> -U <username> <database>

# Example
psql -h appsmith.postgres.database.azure.com -p 5432 -U pgadmin postgres
Create Keycloak Database and User
Once connected to your PostgreSQL database, create a new database for Keycloak and a user with appropriate roles.
- Create the keycloak database:
CREATE DATABASE keycloak;
- Create a new user and set a secure password:
CREATE USER your_username WITH PASSWORD 'your_password';
- Assign the necessary roles to the new user:
GRANT CONNECT ON DATABASE keycloak TO your_username;
GRANT USAGE ON SCHEMA public TO your_username;
GRANT SELECT, INSERT, UPDATE, DELETE ON ALL TABLES IN SCHEMA public TO your_username;
ALTER DEFAULT PRIVILEGES IN SCHEMA public GRANT SELECT, INSERT, UPDATE, DELETE ON TABLES TO your_username;
Replace your_username and your_password with your actual credentials.
Connect PostgreSQL to Appsmith
To connect your PostgreSQL database to Appsmith, follow these steps:
- Open your
docker-compose.ymlfile for the Appsmith and add the PostgreSQL configuration under theenvironmentsection.
Get the APPSMITH_KEYCLOAK_DB_URL from the Connection Strings section of your Azure PostgreSQL instance.
Example:
# PostgreSQL URL format: postgresql://username:password@hostname:port/database

version: "3"
services:
  appsmith:
    image: index.docker.io/appsmith/appsmith-ee
    container_name: appsmith
    ports:
      - "80:80"
      - "443:443"
    environment:
      # External PostgreSQL configuration for Keycloak
      APPSMITH_KEYCLOAK_DB_URL: postgresql://appsmith:password@appsmith.postgres.database.azure.com:5432/keycloak
    volumes:
      - ./stacks:/appsmith-stacks
    restart: unless-stopped
- Save the changes, then restart Appsmith to apply the new configurations:
docker-compose down
docker-compose up -d
Troubleshooting
If you are facing issues during deployment, refer to the guide on troubleshooting deployment errors. If you continue to face issues, reach out to the support team via the chat widget on this page.